Learn how to add study data to your workspace in four steps with a template tsv file. This article also includes templates, screenshots and formatting requirements for organizing and analyzing different types of study data.
To learn more about data tables, entities, and the data model in Terra, see Understanding entity types and the standard genomic data model.
Step 1. Download the template "sample.tsv"
What is a sample table?
A sample table - or any entity table - keeps track of sample data and any associated metadata you want to keep track of. The minimum sample table includes an ID column and a column for links to a data file in cloud storage (could be FASTQ, BAM, CRAM, etc. - whatever form your data are). Historically, tables kept track of data used as input for a workflow.
Download a template sample table (GCP) here.
Download a template sample table (Azure) here.
Sample table template and formatting
-
Sample table in a spreadsheet (GCP)
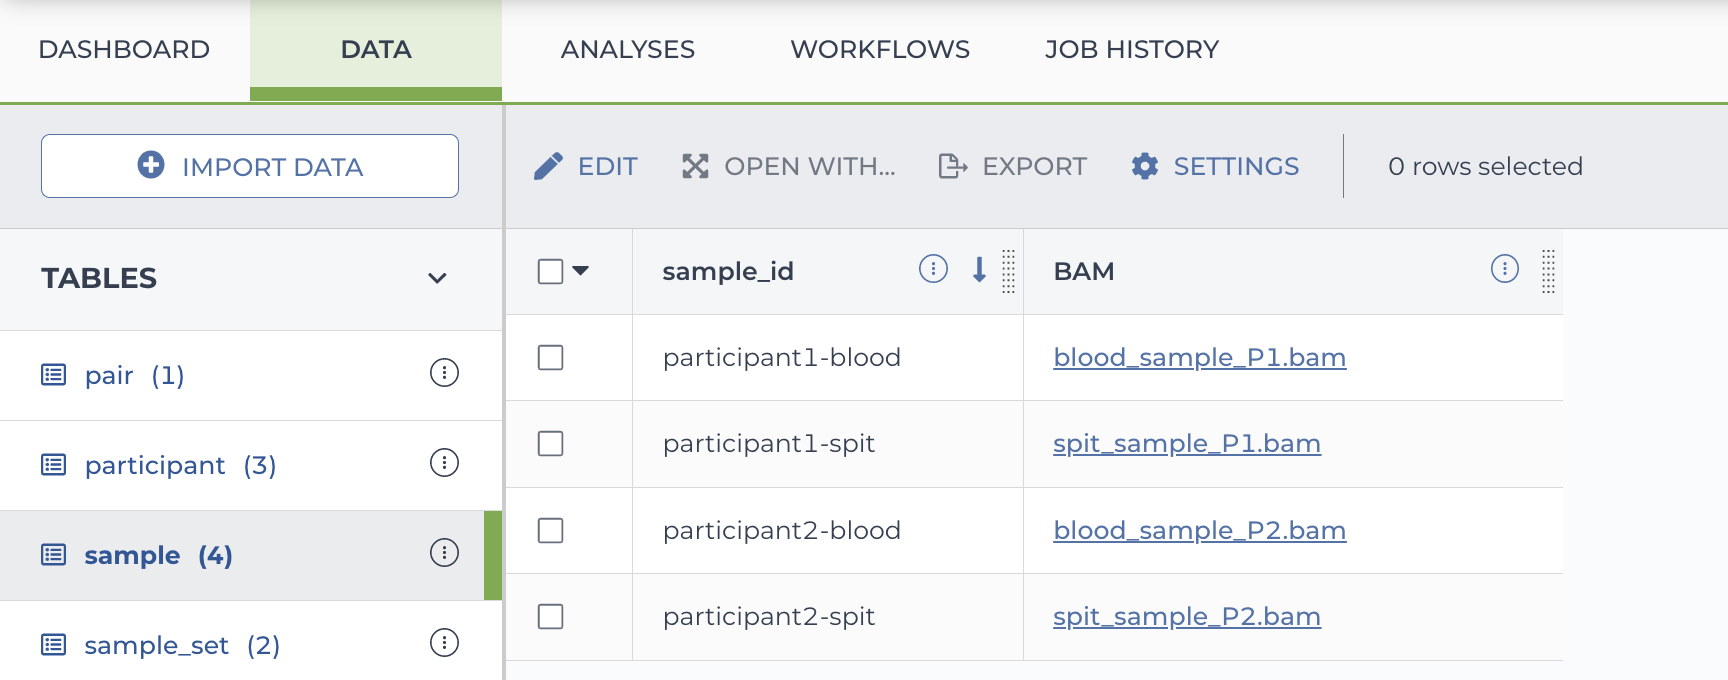
sample_id BAM your-participant1-blood-ID gs://your-bucket-name/blood_sample_P1.bam your-participant1-spit-ID gs://your-bucket-name/spit_sample_P1.bam your-participant2-blood-ID gs://your-bucket-name/blood_sample_P2.bam your-participant2-spit-ID gs://your-bucket-name/spit_sample_P2.bam - The "-id" formatting is optional, but can be useful for remembering the table key (first column).
- You'll use your own values for the sample IDs and data file paths.
Note that if you use the data uploader, you only need to include the file names, not the full paths. See How to use the data uploader for step-by-step instructions.
-
Sample table in a spreadsheet (Azure)
sample_id BAM your-participant1-blood-ID gs://your-bucket-name/blood_sample_P1.bam your-participant1-spit-ID gs://your-bucket-name/spit_sample_P1.bam your-participant2-blood-ID gs://your-bucket-name/blood_sample_P2.bam your-participant2-spit-ID gs://your-bucket-name/spit_sample_P2.bam - You'll use your own values for the sample IDs and data file paths
Note that if you use the data uploader, you only need to include the file names, not the full paths. See How to use the data uploader for step-by-step instructions.
Sample table in Terra
Entity table (i.e., specimen table, unicorn table)
Download a template single-entity.tsv (GCP) here.
The Terra model is flexible, and you can use whatever name you wish for your table. Just remember to use the format entity:your-name_id (GCP) or the name you want in the upload popup (Azure).
-
Unicorn table in a spreadsheet (GCP)
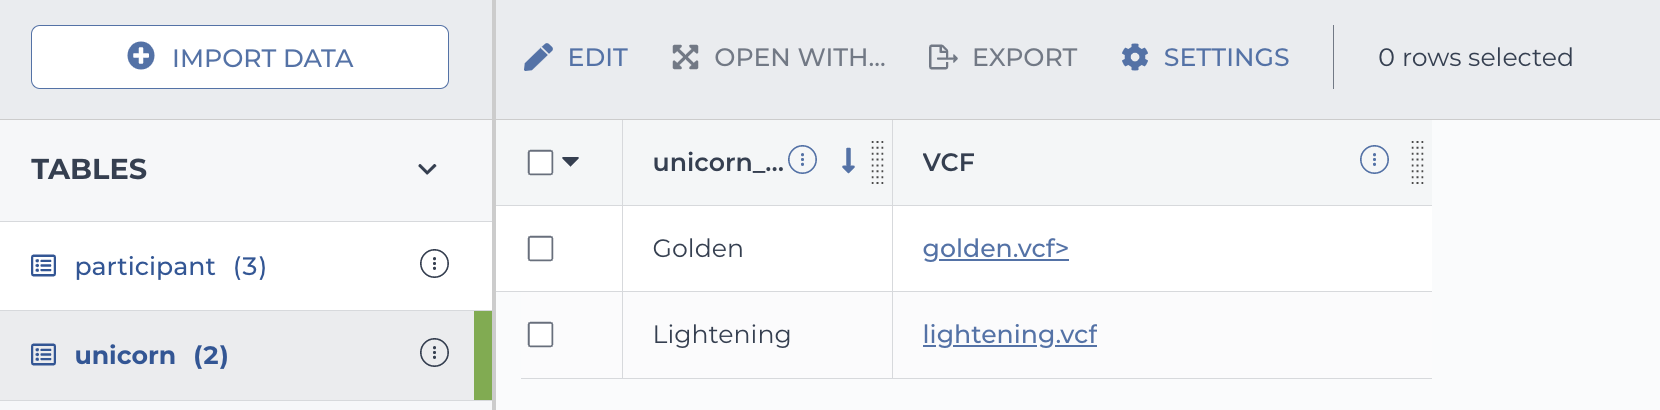
The _id formatting is optional, but can help keep track of which column is the table key.unicorn_id VCF Golden gs://magic-bucket/golden.vcf> Lightening gs://magic-bucket/lightening.vcf Use your own values for the entity name, the entity IDs, the data column header and full paths to data files.
-
Unicorn table in a spreadsheet (Azure)
unicorn_id VCF Golden gs://magic-bucket/golden.vcf> Lightening gs://magic-bucket/lightening.vcf Use your own values for the entity name, the entity IDs, the data column header and full paths to data files.
Unicorn table in Terra
Step 2. Edit in a spreadsheet editor
Open in your favorite spreadsheet editor to edit. Cells can only include alphanumeric characters, "-" and "_" - no spaces are allowed. If you are adding columns of metadata, column headers will be the attribute name of the new column in the updated data table.
Step 3. Save as "tab-delimited text" or "tab-separated values"
Your editor may give you a warning, but we assure you, it's fine! Also, Terra will completely ignore the name you give the file. It's the root entity in the first column header that determines the table name in the workspace.
A note about ".tsv" versus ".txt" file extensions Depending on what spreadsheet editor you use, when you save in the proper format your spreadsheet may have either a ".tsv" or a ".txt" extension. Terra will accept either one.
Step 4. Upload to your workspace
4.1. Click the Import Data button at the top left of the workspace data page.
4.2. Select Upload TSV and follow the prompts.
Overwriting table rows
When your TSV load file has the same entity (name) as a table already in the workspace, you may get an error message when you try to upload about overwriting data (see screenshot).
Terra will only overwrite data rows with the same ID (in the first column). If the TSV (load) file includes different IDs, the data rows will be added to the existing table.
Templates for additional types (including the standard genomic data model)
Click the table below for more information, formatting requirements, and example screenshots.
Participant table
Download a template participant.tsv file (GCP only) here.
What is a participant table?
A participant table organizes participants in a study. The minimum participant table is only one column - the participant ID. This ID can be used in additional tables to associate samples, for example, with the right individuals.
Participant table in spreadsheet (GCP)
| participant_id |
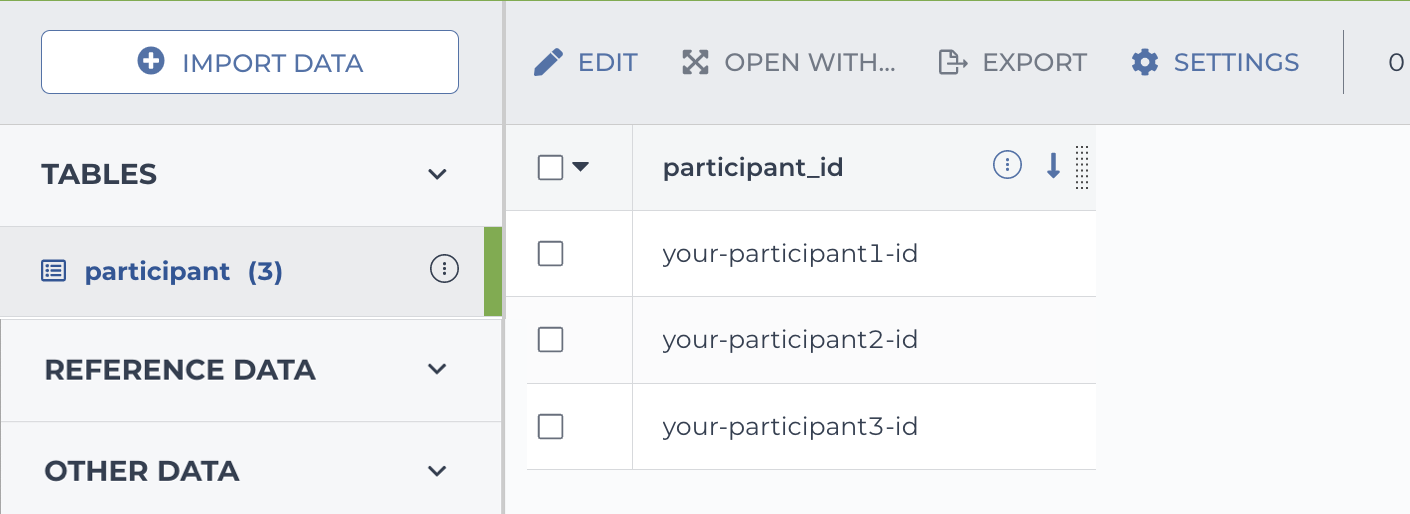
| your-participant1-id |
| your-participant2-id |
| your-participant3-id |
- The "_id" is optional
- You'll use your own participant IDs (note that these must be unique)
Participant table in Terra
Pair table (GCP only)
Download a template pair TSV here
What is a pair table?
Pair tables are a specific type of data table used in cancer research, where somatic workflows typically input samples corresponding to both tumor and normal tissue. Note that the pair table references the particpant_id (in the participant table) and the sample_id of the case and the control sample (from the sample table).
Pair table in spreadsheet (GCP only)
| entity:pair_id | case_sample | control_sample | participant |
| HCC1143-2020 | SM-74P4M | SM-74NEG | HCC1143 |
- The header entries (in red) must be typed exactly as shown
- Customize with your own values for the case sample ID, control sample ID, and participant ID
- The case- and control-sample IDs are from the sample.tsv
- The participant ID is from the participant.tsv table
- Upload in this order: 1) participant.tsv 2) sample.tsv 3) pairs.tsv
Pair table in Terra
Sets of data - sample_set table (GCP only)
Download a template set membership TSV here.
What is a set table?
A set table defines entities grouped into sets for analysis. An entity_set table always refers to entities in an entity table.
Set membership table in a spreadsheet (GCP)
The first column is the unique ID for each set and the second column is the entity_id (in a different - i.e. entity - table). There is a row for every member of a set.
| membership:sample_set_id | sample |
| spit | participant1-spit-sample-id |
| spit | participant2-spit-sample-id |
| blood | participant1-blood-sample-id |
| blood | participant2-blood-sample-id |
- The parts in red ("membership:" and "_set_id" must be typed exactly as shown
- Your entity doesn't need to be samples, but the entity in the headers must match
- There must be an entity table (i.e. "sample") in the workspace already
- The entity table contains links to the input data files
- Customize with your own values for the entity, set IDs and sample IDs (i.e. replace example sets of "spit" tissue and "blood" tissues and "participant1-spit-sample-id")
Set membership table in Terra
To find the samples in each set, click on the link in the "samples" column (see highlighted box for the two samples in the "blood" set):
Workspace-level resources - the Workspace Data table (GCP only)
Download a template Workspace Data table here.
What is it?
The Workspace Data table holds variables you might want to use in multiple workflow analyses - like the genomic reference sequence file, or a Docker container. Using the Workspace Data table lets you configure all at once and point to the resources from within the UI whenever you need them. Not only will you not need to look up reference file paths again, but if you update the resource files, you only need to update in one place.
Workspace Data TSV in a spreadsheet (GCP)
| workspace:ref_fasta | ref_fasta_index | ref_dict |
| gs://public-bucket/Homo_sapiens_assembly.38.fasta | gs://public-bucket/Homo_sapiens_assembly.38.fai | gs://public-bucket/Homo_sapiens_assembly.38.dict |
- Parts in red (i.e. "workspace:") must be typed exactly as shown. Note that this is only required in the first column.
- Customize the resource file keys (header) and full path (second row)
- Note that Terra will reorganize the files in alphabetical order
Workspace Data table in Terra
The screenshot below is what you'll see when you upload the spreadsheet above to a Workspace Data table. The first column (circled on the left) is the key that identifies what the file is. The other (circled on the right) is a link to the file in a Google bucket. You can download or upload TSVs by clicking the link at the top (arrow).
How to associate data in different tables (GCP only)
It is often the case that associated data will be in different tables. For example, a person's genomic data might be in a sample table, and their phenotypic data in a subject table. You will need to be careful about the order you upload the TSV file to make sure Terra keeps the associations.
Step 1: Upload interdependent data tables in order!
If data tables reference entities in another table, the dependent table needs to be uploaded first.
If you are using the standard genomic data model, the order is as follows A > B > C > D ("A > B" means entity type A must be uploaded before entity type B).
A. participant.tsv
B. sample.tsv (or entity.tsv)
C. pair.tsv
D. sample_set.tsv (or entity_set.tsv)
You can also create sets of tumor:normal pair tables using the same formatting. These will be uploaded last.
Step 2: To associate data tables, make sure to check the box
To link information in different tables, you must select “Create participant, sample, pair associations” at the prompt in the pop-up window that appears when you try to upload the files.
Uploading Mutect2
An example of a workflow that requires inputs from participant, sample, pair, and sample_set tables is Mutect2. For a complete description, see the GATK Somatic SNVs and Indels workspace. The workspace includes a notebook tutorial of the workflow that guides users step by step through each tool in the workflow.
The workflow includes tables that references another table, which must be loaded after the first reference.
In the Mutect2 example, the pairs table below references samples (SM-74P4M and SM-74NEG) and participants (HCC1143).
| * | pair_id | case_sample | control_sample | participant |
| * | HCC1143 | SM-74P4M | SM-74NEG | HCC1143 |
The tables must be uploaded in the order below.
- Participant tsv
- Sample tsv
- Pairs tsv
If you uploaded the pairs table before the sample tables (or without selecting that checkbox), the workflow will fail because it reads the sample name from the pair table but has no knowledge of the samples table from where the data files are stored.